Planning a home makeover can feel overwhelming, especially when you’re trying to balance style, budget, and functionality. If you’re searching for a clear, step-by-step interior design renovation checklist, you likely want a practical guide that ensures nothing important gets missed—from initial concept and budgeting to final styling touches.
This article is designed to walk you through every critical phase of the renovation process, helping you avoid costly mistakes, streamline decisions, and create a cohesive look that reflects your vision. We’ve compiled industry best practices, insights from experienced designers, and proven space-planning strategies to ensure the guidance you’re reading is reliable and actionable.
Whether you’re refreshing a single room or undertaking a full-scale remodel, you’ll find a structured checklist that simplifies complex tasks, keeps your project on track, and turns your renovation goals into a well-executed, beautifully designed space.
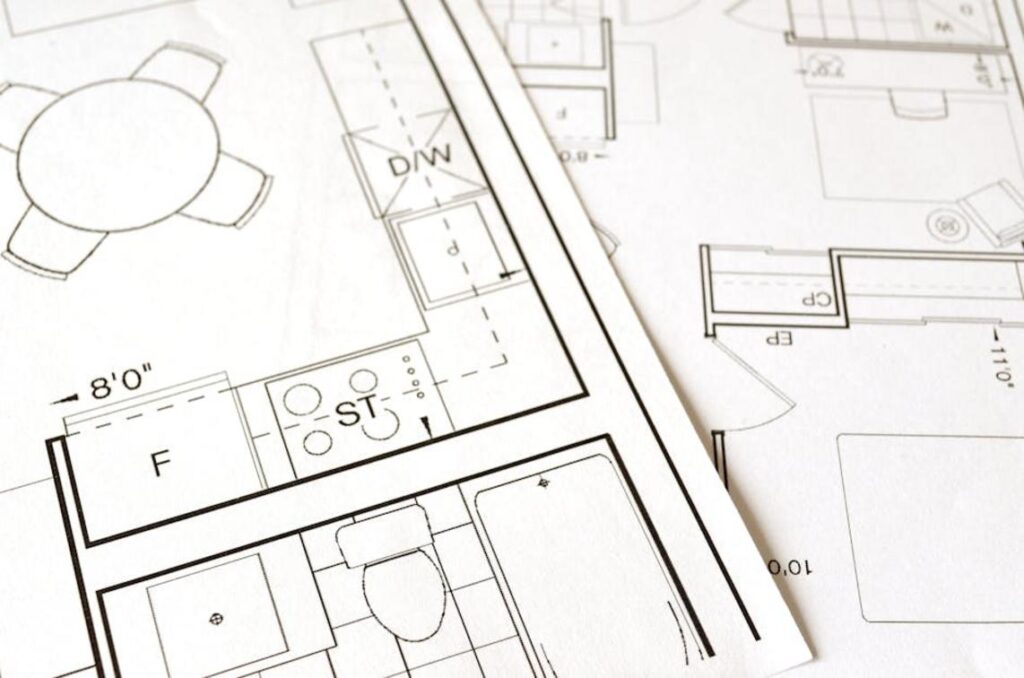
Your Blueprint for a Flawless Home Renovation
A home renovation is equal parts thrilling and nerve-wracking (yes, both can be true). One moment you’re pinning dream kitchens; the next, you’re worrying about dust, delays, and dollars. And that concern is valid. According to a 2023 Houzz study, nearly 1 in 3 homeowners exceed their renovation budget. Without a clear plan, timelines stretch and costs creep.
That’s why this guide exists. Built from years of hands-on design experience and real project case studies, it delivers a practical interior design renovation checklist to keep your vision, budget, and sanity intact—from first sketch to final reveal.
Phase 1: Defining Your Vision & Setting the Foundation
Every successful renovation starts with clarity. Define Scope & Goals by identifying exactly which rooms you’re updating and what success looks like. Are you repainting cabinets and swapping fixtures, or removing walls for an open-concept layout? (Yes, there’s a big difference in budget and stress levels.) Separate your must-haves from your nice-to-haves so you protect what matters most if costs shift. The benefit? You avoid scope creep—one of the top reasons renovations go over budget (Harvard Joint Center for Housing Studies).
Next, Establish a Realistic Budget. Research local labor and material costs and assign a dollar amount to every line item. Most importantly, set aside a 15–20% contingency fund for surprises like plumbing issues or outdated wiring. According to HomeAdvisor, unexpected expenses are more common than homeowners anticipate. Having a cushion means fewer sleepless nights and more confident decisions.
Then, Create a Mood Board & Style Guide. Pull inspiration from Pinterest or magazines to clarify colors, textures, and finishes. This becomes your visual language when speaking to contractors—saving time, reducing miscommunication, and helping you achieve a cohesive look (instead of a “why doesn’t this match?” moment).
Finally, Hire Your Professional Team carefully. Check references, review portfolios, and secure detailed written quotes. A vetted team increases efficiency, protects your investment, and elevates the final outcome.
Think of this phase as your interior design renovation checklist—the blueprint that turns ideas into measurable results. When your foundation is solid, everything that follows becomes smoother, faster, and far more rewarding.
Phase 2: Sourcing Materials & Preparing the Space
This is where your renovation shifts from Pinterest board to real life. Have you finalized every single selection yet? If not, what’s stopping you? Finalize All Selections before demolition begins—flooring, tiles, paint colors, lighting fixtures, hardware, countertops, and appliances. Even one delayed decision can stall contractors (and yes, that one backsplash tile you’re “still thinking about” counts).
Next, Order Long-Lead Items. Custom cabinetry, specialty windows, and high-end appliances can take weeks—or months—to arrive. According to the National Association of Home Builders, supply chain delays have significantly extended material lead times in recent years. Have you checked estimated delivery dates and aligned them with your build schedule? Pro tip: add a two-week buffer to avoid panic mode.
Don’t overlook paperwork. Secure Permits & Approvals early. Many municipalities require permits for structural, plumbing, or electrical updates, and approval timelines vary widely. Are you assuming your contractor handles it, or have you confirmed? Waiting on permits can feel like watching paint dry (except the paint can’t dry without approval).
Finally, Prepare the Renovation Zone. Remove furniture, décor, and valuables. Seal adjacent spaces with plastic sheeting and protect floors from debris. Dust travels—have you planned for it? Think of this step as your interior design renovation checklist in action.
If you need a broader roadmap, revisit the complete guide to planning a home redesign from start to finish.
Ask yourself: are you truly ready to build—or just ready to start?
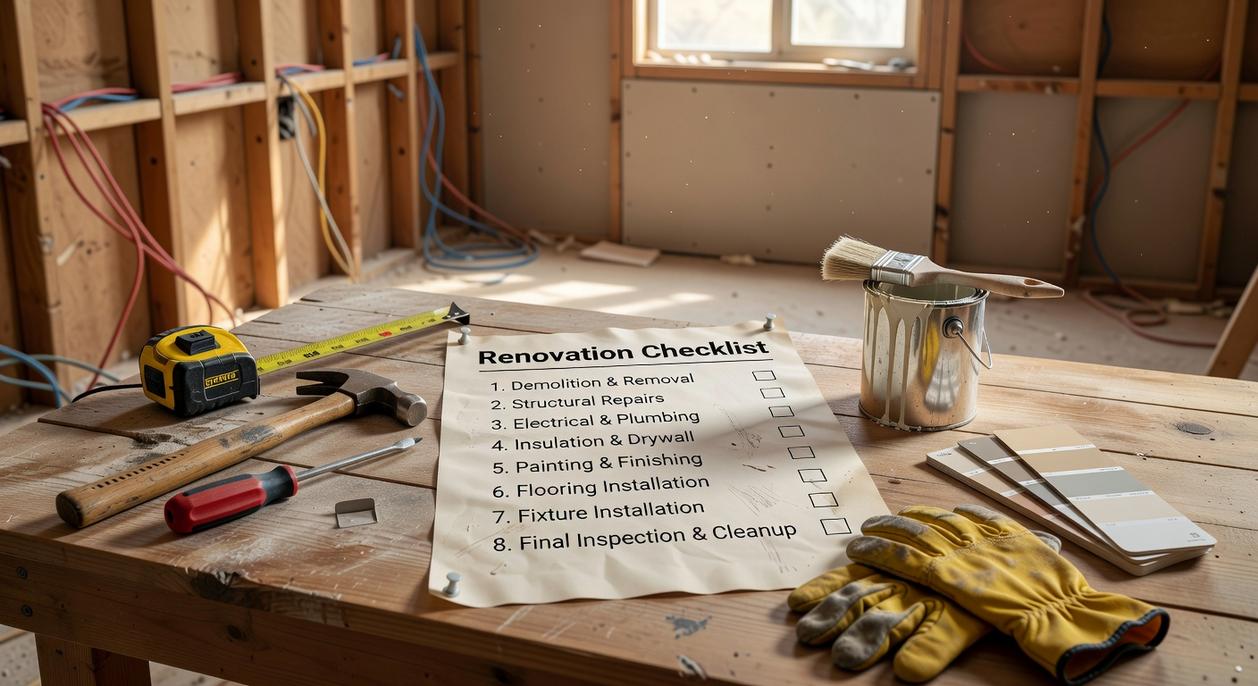
Phase 3: Navigating the Construction & Installation
This is where the real transformation begins (and yes, it gets loud).
Demolition & Structural Work: The first messy step. Walls come down, outdated fixtures are removed, and framing adjustments happen. One contractor once told a homeowner, “If it doesn’t look worse before it looks better, we’re probably not doing it right.” Demolition reveals the bones of your space—load-bearing walls (walls that support the structure above) and framing that may need reinforcement. It’s controlled chaos, but it sets the stage for everything else.
Plumbing, Electrical & HVAC (Rough-ins): With walls open, critical systems are installed or rerouted. Rough-ins refer to the initial placement of pipes, wiring, and ductwork before surfaces are sealed. “This is the time to add outlets,” an electrician advised. “You’ll never regret more power access.” Cross-check progress with your interior design renovation checklist to avoid costly rework.
Drywall, Plastering & Painting: After inspections, walls are closed, plastered smooth, and primed. The first paint coat often goes on before flooring—“Less taping later,” a painter laughed.
Flooring & Tiling Installation: Finally, surfaces shine. Tile patterns, grout lines, and plank direction suddenly make the vision tangible. And just like that, the dust starts to settle.
Phase 4 is where function meets flair. Cabinetry and countertops set the tone: stock vs. custom cabinets is a classic A vs B debate. Stock saves money; custom maximizes storage and personality. After templating, stone or quartz counters slide into place. Then plumbers and electricians return to install sinks, faucets, lighting, outlets, and appliances—builder-grade vs. statement pieces can completely shift the mood. Trim, baseboards, hardware, and paint touch-ups follow. Finally, complete your interior design renovation checklist and conduct a thorough Final Punch List walkthrough to compare expectations vs. reality before releasing final payment (think of it as your season finale).
Renovations overwhelm even the boldest homeowners. The endless decisions—budgets, layouts, lighting, materials—stack up fast, and one missed step can snowball into delays and overspending. People love to say you should “just trust the process.” I disagree. Hope is not a strategy.
What actually works is structure. An interior design renovation checklist turns chaos into sequence, guiding what happens first, next, and last. It prevents costly backtracking and keeps small details from slipping through the cracks.
Instead of winging it, use this checklist as your roadmap. Start with clarity, move with confidence, and build a space you’ll genuinely love. No shortcuts.
Bring Your Vision to Life with Confidence
You started this guide looking for clarity, structure, and reassurance before taking on your renovation project. Now you have a clear path forward — from planning and budgeting to selecting finishes and optimizing every square foot with intention.
Renovations can feel overwhelming. Missed steps, budget overruns, and design regrets are real concerns. That’s exactly why following a detailed interior design renovation checklist matters. It keeps you organized, focused, and in control — so nothing important slips through the cracks.
The key now is action. Take what you’ve learned and apply it step by step. Review your goals, finalize your priorities, and map out your timeline before making any major commitments. Preparation is what transforms a stressful renovation into a rewarding transformation.
If you want expert-backed decor insights, modern styling strategies, and practical space optimization tips trusted by thousands of design enthusiasts, explore more of our in-depth guides today. Start planning smarter, avoid costly mistakes, and create a home that feels intentional, functional, and beautifully yours.
 Director of Community & Partnerships
Ask Eloria Esthova how they got into decor trends and shifts and you'll probably get a longer answer than you expected. The short version: Eloria started doing it, got genuinely hooked, and at some point realized they had accumulated enough hard-won knowledge that it would be a waste not to share it. So they started writing.
What makes Eloria worth reading is that they skips the obvious stuff. Nobody needs another surface-level take on Decor Trends and Shifts, Space Optimization Hacks, In-Depth Guides. What readers actually want is the nuance — the part that only becomes clear after you've made a few mistakes and figured out why. That's the territory Eloria operates in. The writing is direct, occasionally blunt, and always built around what's actually true rather than what sounds good in an article. They has little patience for filler, which means they's pieces tend to be denser with real information than the average post on the same subject.
Eloria doesn't write to impress anyone. They writes because they has things to say that they genuinely thinks people should hear. That motivation — basic as it sounds — produces something noticeably different from content written for clicks or word count. Readers pick up on it. The comments on Eloria's work tend to reflect that.
Director of Community & Partnerships
Ask Eloria Esthova how they got into decor trends and shifts and you'll probably get a longer answer than you expected. The short version: Eloria started doing it, got genuinely hooked, and at some point realized they had accumulated enough hard-won knowledge that it would be a waste not to share it. So they started writing.
What makes Eloria worth reading is that they skips the obvious stuff. Nobody needs another surface-level take on Decor Trends and Shifts, Space Optimization Hacks, In-Depth Guides. What readers actually want is the nuance — the part that only becomes clear after you've made a few mistakes and figured out why. That's the territory Eloria operates in. The writing is direct, occasionally blunt, and always built around what's actually true rather than what sounds good in an article. They has little patience for filler, which means they's pieces tend to be denser with real information than the average post on the same subject.
Eloria doesn't write to impress anyone. They writes because they has things to say that they genuinely thinks people should hear. That motivation — basic as it sounds — produces something noticeably different from content written for clicks or word count. Readers pick up on it. The comments on Eloria's work tend to reflect that.